Understanding Electrical Tester
What is an Electrical Tester?
An electrical tester is a device designed to assess electrical circuits. It helps in identifying issues like live wires, faulty circuits, and voltage levels. There are various types of electrical testers, each with specific functions, such as voltage testers, continuity testers, and multimeters. Understanding how to use an electrical tester correctly is vital for ensuring that your electrical projects are safe and efficient.
Types of Electrical Tester
-
Voltage Tester: A simple tool that checks if a wire or device is live. It indicates the presence of voltage in an electrical circuit.
-
Continuity Tester: This tester checks if there is a continuous electrical path between two points. It’s particularly useful for identifying broken wires.
-
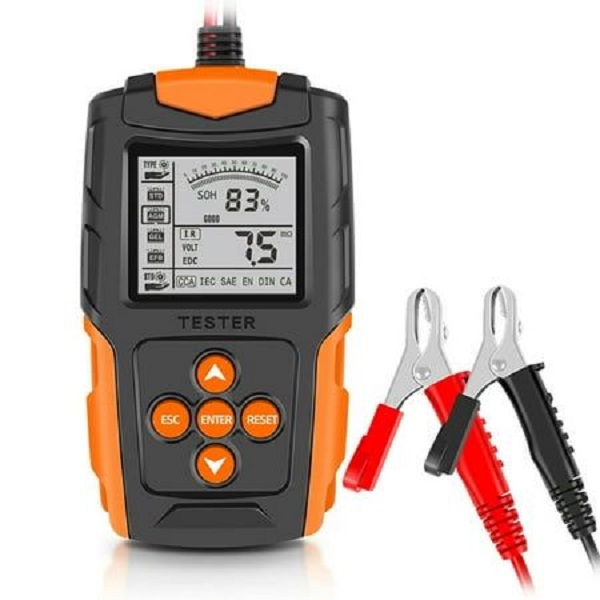
Multimeter: A versatile tool that measures voltage, current, and resistance. It’s a must-have for more advanced electrical work.
-
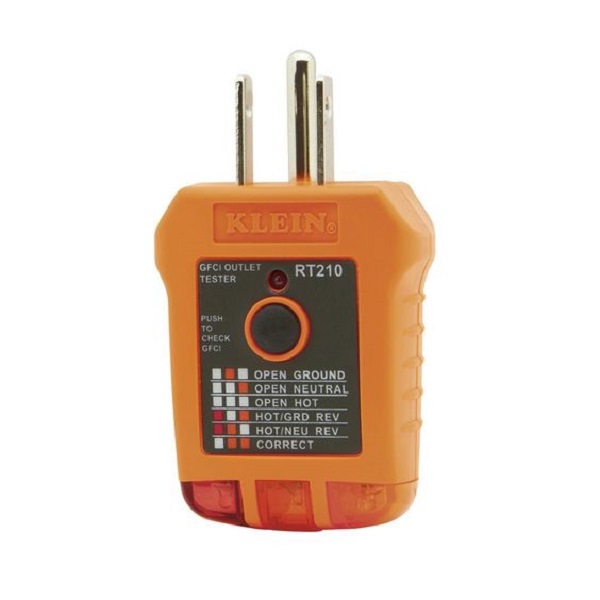
Plug-In Circuit Analyzer: This device is plugged into an outlet to check for correct wiring and detect common issues like open grounds or reverse polarity.
-
Non-Contact Voltage Tester: A safe tool for detecting the presence of voltage without touching the wires. It’s perfect for beginners who are still learning how to use electrical testers.
Why You Need an Electrical Tester
Electrical testers are indispensable for several reasons:
-
Safety: Working with electricity is dangerous. An electrical tester helps ensure that circuits are de-energized before you work on them, reducing the risk of electric shock.
-
Efficiency: Electrical testers save time by quickly identifying electrical problems. This efficiency is especially valuable for professionals who need to diagnose issues quickly.
-
Versatility: With various types of testers available, you can tackle a wide range of electrical tasks, from simple wiring checks to more complex troubleshooting.
Understanding how to use an electrical tester can prevent accidents, save time, and provide peace of mind when working with electricity.
How to Use a Voltage Tester
Step-by-Step Guide
Using a voltage tester is straightforward. Here’s how to do it:
-
Turn Off the Power: Before testing, turn off the power to the circuit you’re working on. This step is crucial for your safety.
-
Set the Tester to the Appropriate Setting: Most voltage testers have settings for AC and DC voltage. Make sure your tester is set to the correct mode for the circuit you’re testing.
-
Test the Tester: Before using it on a live circuit, check that the voltage tester is working correctly. You can do this by testing a known live circuit.
-
Test the Circuit: Place the tester’s probes on the wires or terminals you want to test. The tester will indicate if voltage is present.
-
Interpret the Results: If the tester indicates voltage, the circuit is live. If not, it’s safe to proceed with your work.
Common Mistakes to Avoid
While using a voltage tester is relatively simple, there are common mistakes that even experienced users can make. Avoid these to ensure accurate readings:
-
Not Testing the Tester First: Always verify that your tester is functioning before relying on it. This step is critical for safety.
-
Using the Wrong Setting: Ensure that the tester is set to the correct mode (AC or DC) for the circuit you’re testing. Using the wrong setting can lead to inaccurate readings or damage to the tester.
-
Assuming No Voltage Means Safety: Just because a voltage tester shows no voltage doesn’t mean the circuit is completely safe. There could be residual energy or other issues at play. Always proceed with caution.
How to Use a Continuity Tester
Step-by-Step Guide
A continuity tester is used to check whether a circuit is complete, meaning electricity can flow through it. Here’s how to use one:
-
Turn Off the Power: As with any electrical work, ensure the power is off before testing.
-
Set Up the Tester: Most continuity testers will light up or buzz when they detect a complete circuit.
-
Test the Circuit: Place the tester’s probes on either end of the circuit or component you want to test. If the tester lights up or buzzes, the circuit is complete.
-
Check for Breaks: If the tester doesn’t indicate continuity, there may be a break in the circuit. This could be due to a cut wire or a failed component.
Troubleshooting with a Continuity Tester
A continuity tester is invaluable for diagnosing issues in electrical circuits. Here’s how to use it for troubleshooting:
-
Testing Wires: If a wire isn’t conducting electricity, it may be broken internally. Use the continuity tester to check the wire’s integrity.
-
Checking Switches: A switch should have continuity when turned on. If it doesn’t, the switch may be faulty and need replacement.
-
Inspecting Fuses: A blown fuse will have no continuity. Use the tester to check if a fuse is the cause of an electrical failure.
Understanding how to use a continuity tester can help you quickly diagnose and fix electrical problems.
How to Use a Multimeter
Step-by-Step Guide
A multimeter is a multifunctional tool that can measure voltage, current, and resistance. Here’s how to use it:
-
Select the Correct Mode: Depending on what you’re measuring, set the multimeter to the appropriate mode (voltage, current, or resistance).
-
Test the Multimeter: Before using it, ensure your multimeter is working correctly by testing it on a known circuit.
-
Measure Voltage: To measure voltage, place the probes on the circuit’s live and neutral wires. The multimeter will display the voltage reading.
-
Measure Current: To measure current, you’ll need to connect the multimeter in series with the circuit. Be cautious, as this can be more dangerous than measuring voltage.
-
Measure Resistance: For resistance, disconnect the component from the circuit, set the multimeter to the resistance mode, and place the probes on the component’s terminals.
Advanced Uses of a Multimeter
Beyond basic measurements, a multimeter can be used for more advanced tasks:
-
Testing Batteries: You can measure a battery’s voltage to determine if it’s still good. A significantly lower reading than the battery’s rated voltage indicates it needs replacement.
-
Checking Diodes: Use the multimeter’s diode setting to test diodes. The multimeter will show the forward voltage drop when the diode is forward-biased.
-
Detecting Shorts: By measuring resistance across different points in a circuit, you can detect shorts or open circuits.
Learning how to use a multimeter effectively can greatly enhance your ability to troubleshoot and repair electrical systems.
Safety Tips When Using Electrical Testers
General Safety Guidelines
Working with electricity is inherently dangerous, so it’s crucial to follow safety guidelines when using electrical testers:
-
Always Test on a Known Circuit: Before using any tester, verify it’s working by testing it on a known live circuit.
-
Wear Protective Gear: Use insulated gloves and safety glasses when working with electrical circuits.
-
Turn Off Power: Always turn off the power to the circuit before testing. Double-check that the circuit is de-energized before proceeding.
-
Use the Right Tool: Different electrical tasks require different testers. Make sure you’re using the appropriate tester for the job.
Dealing with High Voltage
When working with high voltage, extra precautions are necessary:
-
Use a Non-Contact Voltage Tester: These testers allow you to check for the presence of voltage without touching the wires, reducing the risk of shock.
-
Avoid Working Alone: If you’re dealing with high voltage, it’s safer to have someone nearby who can help in case of an emergency.
-
Follow Proper Lockout/Tagout Procedures: If working in a professional setting, ensure that lockout/tagout procedures are followed to prevent accidental energization of circuits.
Understanding how to use an electrical tester safely can prevent accidents and ensure that your electrical work is completed without incident.
Mastering Electrical Troubleshooting with Testers
Electrical testers are indispensable tools for anyone working with electrical systems. Whether you’re a seasoned electrician or a DIY homeowner, understanding how to effectively use these devices is crucial for safe and efficient troubleshooting. From simple voltage testers to versatile multimeters, these tools empower you to diagnose electrical problems accurately and swiftly.
Remember, safety should always be your top priority when dealing with electricity. By combining the right tools with a solid understanding of electrical principles, you can confidently tackle electrical tasks, minimizing the risk of accidents and ensuring the reliable performance of your electrical systems.