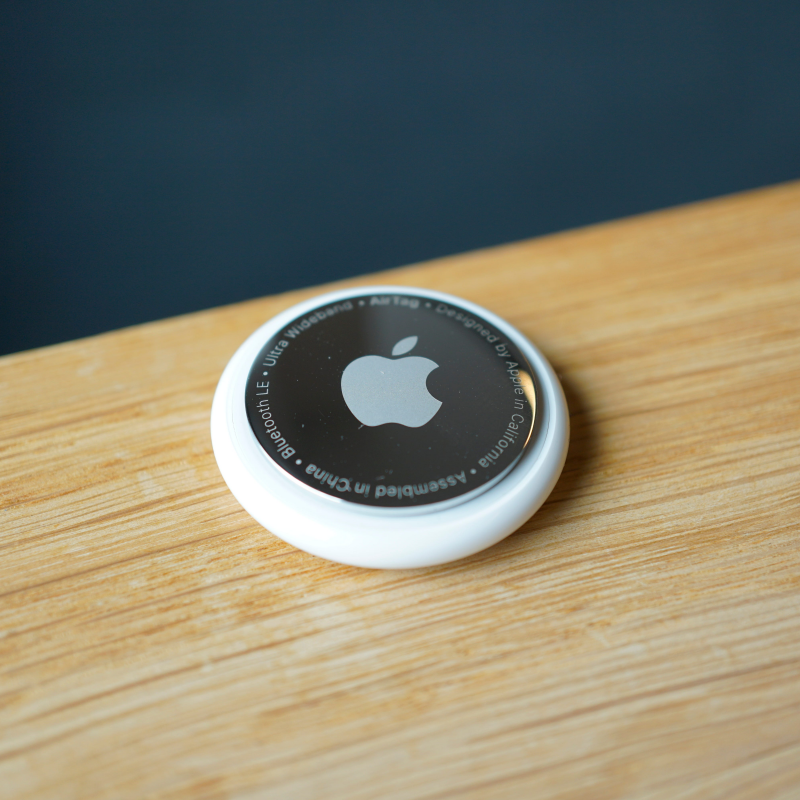
Introduction: Understanding the AirTag and Its Battery Life
Apple’s AirTag is a compact tracking device designed to help users locate their personal belongings with ease. Whether it’s your keys, backpack, or luggage, the AirTag works seamlessly with your iPhone, enabling you to track items through the Find My app. While the functionality of the AirTag is impressive, one factor that users must consider is battery maintenance. An essential aspect of keeping your AirTag operable is understanding how to change the battery on AirTag when it runs low.
AirTags are powered by a CR2032 battery, which is widely available and rather simple to replace. However, many users may feel uncertain about the process or may overlook it altogether. This comprehensive guide aims to explain everything you need to know about AirTag battery replacement, including how to change the battery on AirTag efficiently, tips for battery longevity, and when to know it’s time for a replacement. By the end of this article, you’ll have a clearer understanding of maintaining your AirTag and ensuring it works optimally for tracking your belongings.

Understanding the AirTag Battery: Basics and Specifications
Before diving into the steps for how to change the battery on AirTag, it’s important to understand battery basics and specifications.
What is an AirTag Battery?
The AirTag operates using a CR2032 coin cell battery. This type of battery is compact, lightweight, and provides reliable power to the device. The CR2032 battery is a well-known battery type found in various electronic devices, such as watches, computer motherboards, and fitness trackers.
Battery Life
One of the remarkable features of the AirTag is its impressive battery life. Under standard usage conditions, the CR2032 battery used in AirTags can last for approximately one year before needing replacement. However, heavy usage, frequent tracking, and constant pinging may reduce battery life.
Battery Indicator
AirTags are designed to notify you when the battery is running low. You will receive a notification through your linked iPhone if the battery power is dwindling. This feature ensures that you can take timely action before your AirTag becomes inoperable.
When to Change the Battery on AirTag
Being proactive about battery replacement can save you from inconvenience. Here are some indicators that suggest it’s time to change the battery on your AirTag:
Receiving Battery Notifications
As mentioned earlier, if your iPhone sends you a notification indicating that the AirTag battery is low, it’s time to replace the battery. Do not ignore this alert, as operating an AirTag on a low battery can lead to connectivity issues.
Inconsistent Tracking Performance
If you notice that your AirTag isn’t responding promptly, or if the location updates are inconsistent, it might be a sign that the battery is failing. A quick battery replacement can resolve these issues.
Difficulty with Connectivity
If you struggle to connect to your AirTag or experience lag in its functionality, consider changing the battery. These issues may stem from a depleted battery rather than a fault in the AirTag itself.
Physical Signs of Battery Drainage
Sometimes, physical indicators can help you determine whether it’s time to replace the battery. Check the AirTag for any signs of damage or corrosion around the battery compartment. If it looks compromised, opt for a battery change.
Tools and Materials Required to Change the Battery on AirTag
Before you begin the process of replacing the battery, ensure you have the necessary tools and materials. Fortunately, changing the battery on AirTag is a simple task that requires minimal equipment:
CR2032 Battery
First and foremost, you’ll need a new CR2032 battery. These batteries can be found at most electronics stores, pharmacies, or larger retailers. Ensure that the battery you choose is of good quality to guarantee optimal performance.
A Clean Surface
To perform the battery replacement effectively, choose a clean, flat surface where you can work without distractions. This practice will help you avoid losing any small components and keep the work area organized.

Optional Tools
While you typically won’t need any special tools to change the battery on AirTag, having a soft cloth or towel nearby is a good idea. This cloth can help you clean the AirTag while you’re working on it or catch any small parts that roll away.
Step-by-Step Guide on How to Change the Battery on AirTag
Now that you’re prepared, let’s walk through the steps on how to change the battery on AirTag effectively:
Step One: Gather Your Supplies
As mentioned earlier, ensure you have a new CR2032 battery, a clean surface to work on, and any optional tools you wish to use, such as a soft cloth.
Step Two: Remove the Back Cover
The back cover of the AirTag is where you’ll find the battery compartment. To remove it, gently press down on the stainless steel back cover while simultaneously turning it counterclockwise. You should hear a click as the cover loosens. Once the cover is released, carefully lift it away from the device.
Step Three: Remove the Old Battery
With the back cover removed, you will see the old CR2032 battery resting in its compartment. Carefully lift the battery from its spot, taking care not to touch any internal components. If the battery is stubborn, gently wiggle it or use a non-metallic tool to pry it out.
Step Four: Insert the New Battery
Now that you’ve removed the old battery, it’s time to replace it with your new CR2032 battery. Ensure that the positive (+) side of the battery is facing upwards (away from the device). Press the battery into the compartment until it sits firmly in the correct position.
Step Five: Reattach the Back Cover
Once the new battery is in place, it’s time to reattach the stainless-steel back cover. Position it over the AirTag, ensuring it aligns with the device. Press down firmly and gently turn it clockwise until you hear a click that signifies it is securely locked in place.
Step Six: Test the AirTag
Once you’ve successfully replaced the battery and reattached the cover, it’s a good idea to test your AirTag to ensure it’s functioning properly. Open the Find My app on your iPhone, and check if the device shows up in your list of items. If everything looks good, your AirTag is ready for use again.
Tips for Maintaining Your AirTag’s Battery Life
To maximize the lifespan of your AirTag’s battery, here are some helpful tips for maintaining effective battery usage:
Store Your AirTag Properly
When not in use, store your AirTag in a cool, dry place. Avoid leaving it exposed to extreme temperature variations or direct sunlight, as these conditions can impact battery performance over time.
Limit Signal pings
Frequent use of the AirTag’s signaling features can drain the battery faster. If you’re not actively searching for an item, consider switching off the location features temporarily.
Monitor Battery Health
Regularly check the battery health through notifications from your iPhone. Maintaining awareness of your AirTag’s battery life can help you manage its usage efficiently.
Regularly Clean the Device
Keep your AirTag clean and free of dirt or debris. Occasionally, wiping the device with a soft cloth can help maintain overall performance and ensure proper contact between the battery and device.
What to Do If Your AirTag Still Isn’t Working
If you’ve changed the battery and your AirTag still isn’t functioning, consider the following steps:
Reset Your AirTag
To troubleshoot any issues, resetting your AirTag can be a helpful step. To do this, remove the battery and wait at least 30 seconds before reinserting it. Then, press down on the battery until you hear a sound. Once the sound is confirmed, you can try to reconnect it to your iPhone through the Find My app.
Check Compatibility Issues
Ensure that your AirTag is correctly linked to your Apple ID. If you’ve recently changed devices or your Apple ID settings, compatibility problems could arise. Re-link the AirTag to your device and check the connection settings.
Update iOS Software
Outdated software on your iPhone can cause connectivity issues. To prevent this, ensure that your iPhone’s iOS is up to date. Go to Settings -> General -> Software Update and check for any available updates.
Seek Apple Support
If you’ve tried all troubleshooting methods and your AirTag is still not functioning, it might be time to seek further assistance. Contact Apple Support or visit your local Apple Store for specialized help.

Conclusion: Keeping Your AirTag Functional and Efficient
In conclusion, knowing how to change the battery on AirTag is vital for maintaining its functionality and performance. With a simple process of removing the back cover, replacing the old battery with a new CR2032, and reattaching the cover, you can ensure that this handy tracking device continues to help you manage your belongings effectively.
Regular maintenance and proper care not only extend the life of your AirTag but also enhance your overall experience with its features. Changes to the way we secure and track our possessions are continually evolving, and the AirTag offers a practical solution for everyday challenges.
By understanding battery life, knowing when to replace it, and applying tips for maintenance, you hold the key to optimizing your AirTag’s performance. So, whether you’re using it to keep track of your keys, wallet, or bag, ensure that your AirTag is fit for duty—ready to help you reclaim lost items swiftly and efficiently.